Photobucket

Saturday, August 20, 2011

The best possible end to our Summer!!

Today is one amazing day for our family! My sweet boy was BAPTIZED!! This summer, Gavin attended Pine Cove's Base Camp and gave his life to Jesus.  It was awesome! He told his counselor and then we had a huge discussion about it that night!

This is Gavin with his counselor Whoa Nelly

Today we finalized his commitment to the Lord with his scriptural baptism.  Our sweet friends gave us the use of their pool (Thank you, Lester family, again!). So, after some wonderful fellowship with our friends and some yummy favorite foods of Gavin's...we gathered to see one of Chad's and my proudest moments!

 The kids gathered along the side listening intently to Pastor Cory

 Pastor Cory is explaining the ABC's of Baptism

 Gavin telling Pastor Cory that YES he is ready to follow Jesus for the rest of his life!!

 ...and all his sin is washed away! (tear)

He is truly as happy as this picture makes him look!!

YAY, GAVIN!!

Thursday, August 11, 2011

Vestal version of Mongolian Beef w/ Bell Pepper & Fried Rice

I have no picture of the yumminess we enjoyed tonight, but if I don't write about it now, I will lose what I did.  You see...I'm an adaptive cook.  I mostly make a meal from what I have.  I found a yummy looking Mongolian Beef recipe on Pinterest. It looked spectacular but I wanted one that I could put in the crock-pot and let cook without much work.  I googled and found this one on food.com. I didn't have all the ingredients and felt I could make something tasty from less.  So...here it goes!

This is Easy Peasy...

Mongolian Beef

Ingredients 
  • 2 lbs thin sliced stir fry meat
  • 1/4 cup corn starch - 1/4 cup flour (mix)
  • 1 medium onion thinly cut
  • 2 cloves of garlic minced
  • 1 tsp ground ginger
  • 1/4 cup brown sugar
  • 1/2 cup of water
  • 1/2 cup low sodium soy sauce
  • red pepper flakes (this is up to you)
  • salt and pepper to taste
  • 2 bell peppers chopped
In a gallon bag put corn starch/flour mix and meat cut into 3in long strips and shake, shake, shake! Once meat is lightly coated set aside.  In the crock pot line the bottom with slices of onion, then garlic, ginger, and brown sugar.  Next, throw in the meat!  The corn starch with help thicken the sauce as it cooks.  Once the meat is in the pot, pour in water and soy sauce and red pepper flakes.  Let cook for 5-6 hrs on low.  An hour before serving add chopped up bell pepper and let cook some more.  YUMMY!!

Easy Fried Rice

Ingredients
  • 4 tbsp vegetable oil
  • 1/2 medium onion
  • 1 1/2 cups shredded carrots
  • 1/2 cup frozen thawed peas
  • 1/2 cup soy sauce 
  • 4 cups cooked rice (We like lots of rice...also, I used 5 min rice)
  • 1 tbsp salt
First, cook your rice and set aside to get good and cool.  I did this about an hour before I actually cooked the fried rice.  When your are ready the the yummy stuff, heat your pan...I don't own a wok :(, so, I used my trusty big cooking pan that I use for everything.  Heat oil in the pan...add onion and carrots to saute.  I think this is where the doneness is up to you.  We enjoy a little crunch.  Add thawed peas and cooked rice.  Pour soy sauce all over rice and mix.  I just kept folding it into itself as it cooked.  Salt to desired saltiness. 

I have never made "Chinese" food at home.  Probably out of fear that I would FAIL...but according to my husband and friend Rebecca, this was a major PASS! 

~Marlee

Saturday, July 30, 2011

If the kids would just entertain themselves...

If the kids would just entertain themselves...Oh the dresses I could make with all the extra t-shirts I have!! 

I just finished another one...Very soon a new little Vestal girl will join the family.  Rylee Grace will be here soon and my cousin-in-law asked ME if I could make one of my little dresses for her to come home from the hospital!!  YES I CAN!! I was so beyond honored.  

Now for the hard part...a newborn dress. It turned out tiny, but newborn babies tend to be extra tiny.  It is crazy how fast babies grow and how soon you forget how little they were.  OK...back to our little Rylee...the material requested was Camo and pink! LOVE it!  

Anyway...Here is your new dress baby girl.  We can't wait for you to get here.


...but, of course, I couldn't stop with just a dress...she will need a coordinating diaper cover, duh...


...not finished yet...

 ...please notice the little flower clip at the top of the hanger...!! I love this so much and pray little Rylee will too!

Wednesday, July 27, 2011

Just call me Miss Creative!!

Let me preface this post by sharing my fight...my fight against anything domestic!  As a teenager I refused to take home economics...I saw no reason to be in 4H and learn to sew...I was headed for a courtroom where I would show men what a strong woman was all about.  I might get married, but I was not so sure about the whole kids thing.  WOW, have things changed... Anywho...Moving on...


First let me thank the phenomenon that is Pinterest.  You have helped open my eyes to all things possible in my creativity palate!!  So...with that said, here is my post about the sweet little t-shirt dress I made my little girl.


As I searched through all the Pinterest postings, I found one for a t-shirt dress tutorial...What's better than t-shirt material??  No need to hem!! Genius!  If you look closely, you can see the matching rose bow!  The rose came from yet another blog (matsutake blog) helping me give that t-shirt new life!  (To make the flower you cut a lonnnng strip of fabric...sew a straight line with a large amount of space between each stitch, -a setting on your machine- ...and then you grab one of the strings, and carefully pull the string as you push the material down.  Work it around in a circle to make a rose...I sewed it together by hand as I did that...she glues it)  So...I loved how the dress turn out so much, that I made another! 


You see, It is hard to find such cute collegiate wear for the fashionable 10 month old!!  The best thing about this little dress is that next year she will be able to wear as a tunic with some cute leggings!

...But, I'm not through being crafty...there is more!  I wanted to use my new found (really just reunited craftiness) to make something for my friends little girls for their birthdays...both in July.  I bought material to make pillowcase dresses, but that didn't happen.  I ended up going to the party and profusely apologizing for not bearing any gifts, but with promises of gifts, I left with a plan...make something or get something ASAP!

He is what I came up with...


Felt messenger bags!  I am planning on making a messenger bag of my own for my time as a MOPS Discussion Group Leader this year...you know, for folders and papers and such.  So, I had the general idea in my head.  All it took was three pieces of felt, cute felt flowers I found at the Walmart, and coordinating ribbon...and, of course, thread and a sewing machine.

Is it silly to say, I can't wait to see where else that sewing machine takes me??


Thursday, July 14, 2011

Fun Pink Stretchy Pant Material Flower Hair Clip!

If you saw my baby's cute shoes in my last post, then look at the cute matching hair clip!!


I'm gonna attempt one of those posts showing  play by play instructions...ummm, bare with me.  Theses are the supplies I used.


  • material (thicker cotton knit)
  • needle and thread
  • scissors
  • hot glue/glue gun
  • alligator clip
  • small piece of ribbon (to cover the end of clip)

Ok, first you need a good piece of thick cotton. I, of course, chose an old pair of Pink Stretchy Pants, to cut up for the sake of my daughter's fashion.  It can be accomplished with a 10in x 10in square of fabric.  I used whatever piece I had left from the shoes...


 Note: You want the flower petals to curl up so cut accordingly.  Cut the material in strips to form your petals.  Their are three petal strips to each flower layer.


You will need 3-1in petal strips, 3-3/4in petal strips, and 1-1/2in center petal strip, cut rounded off at the ends...I am guesstimate kinda person.  I would say the larger strips are 2 1/2in long, then 2in or a little smaller for the next size, and then 1 1/2in for the little petal....like this:


I cut these wrong for the picture and had to redo it so I would have the curled up petals...that's what happens when you are trying to feed your daughter banana and do this at the same time...


Now to form the petal layers...You need to make, almost a circle, with both layers.  Then stack 'em.


Place the little one perpendicular to the last petal strip smack dab in the middle.


Now pull out your threaded needle and stitch it all together...and you have the flower!


Now we add the clip...First, make sure you have the glue gun loaded and heated up.  Cut a small piece of scrap material to cover the glued on clip.  the flat side of the clip will go against the baby's head, so, you will glue the other side to the bottom of the flower.  I put it a little off center so it lays right on her head.  Place a little glue on the small material piece in side the clip.  Then glue the material to the flower.  It will look like this:


Voila!

At the last minute I decided it needed a ribbon cover over the end of the clip... 


:o) Marlee 


Mommy the copycat

Yep...that's me.  I love to recreate homemade things I see on the internet and from pictures.  So, I have dubbed myself the "Copycat Mom."  
So, where did this all this randomness come from?  I made these fabulous baby girl shoes yesterday (and into this morning) that I saw on Etsy.


I started with these two adorable flowers!

  Here is a the link to the Etsy originals... Cool Etsy shoes I copied!

I made them out of an old pair of stretchy pink pants I had (yes, I owned pink cotton stretchy pants...but note that is now past tense!)  Next on the agenda...a bow to match!!  Oh, how I love having a girl!!!

(Maybe if I get time, I will do a step by step how to kinda post for these!)

Tuesday, July 12, 2011

The 3rd Piece of Our Puzzle

(I started this post with the intentions of telling all about my first born in a quick little story...well, that will be impossible because he is 10.  Ten years into a short little blog post...not likely.  So, the following is just about how he got here.)

He's so handsome, right (OK...I'm a little partial)??  Griffin Cale Vestal came into our life February 19, 2001.  He was perfect!!  No, I mean really perfect...his Apgar score (some silly little score that nurses and doctors give babies when they are born for appearance, activity, color...stuff like that) was a 10!  Chad and I scored him a 10+++.  He had the prettiest face and color and made our little family whole. He weighed 6lbs 13oz and was 20 3/4 inches long.  He was a tiny little bundle of joy!


This little guy (not so little anymore) was amazing...he was so smart even then.  He started sleeping through the night at 5 weeks old....ALLELUIA!!  He was such a blessing and hardly ever cried.  I was able to take 9 weeks off from work before I had to leave him...let's just say that was the hardest thing ever!  Even though I left him with a dear friend I thought the the day would never end.  (Ummm...and that was with seeing him at lunch, too!)  


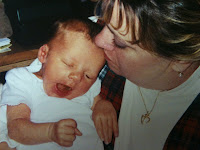
We were smitten to say the least...he was fun, fun, fun...probably because he slept all night.  Here are a few more pictures of our 3rd puzzle piece as a little guy.


I hope I get better at this as I go along!